Quick Start Guide
Download & install the App
Please search “WirelessUSG Flash” in the App Store or “WirelessUSG_Flash” in Google Play. If the app asks for an administrator or operator password, please enter 123456.


First Time Connection
1. Charge the scanner to ensure battery is full.
2. Press the center button to power on your probe, a blue light will appear on the button and the battery indicator will light up in blue.
3. Enable your phone's (or tablet's) WiFi.
4. Among your WLAN list, select the Wifi ID with the same last several characters/numbers as the SN on the back of the probe.
5. Input the connection password (on the back of the probe, the SN with the lower case is the password, for example, if the SN is WXPCAKK020, the password is wxpcakk020).
6. Once you successfully connect the probe's wifi to your device, you can launch and open the App.

App Settings (Adjustments)
For tablets, parameter adjustment is available on the left side of the App interface. For smartphones, parameter adjustment is available at the bottom of the App interface.
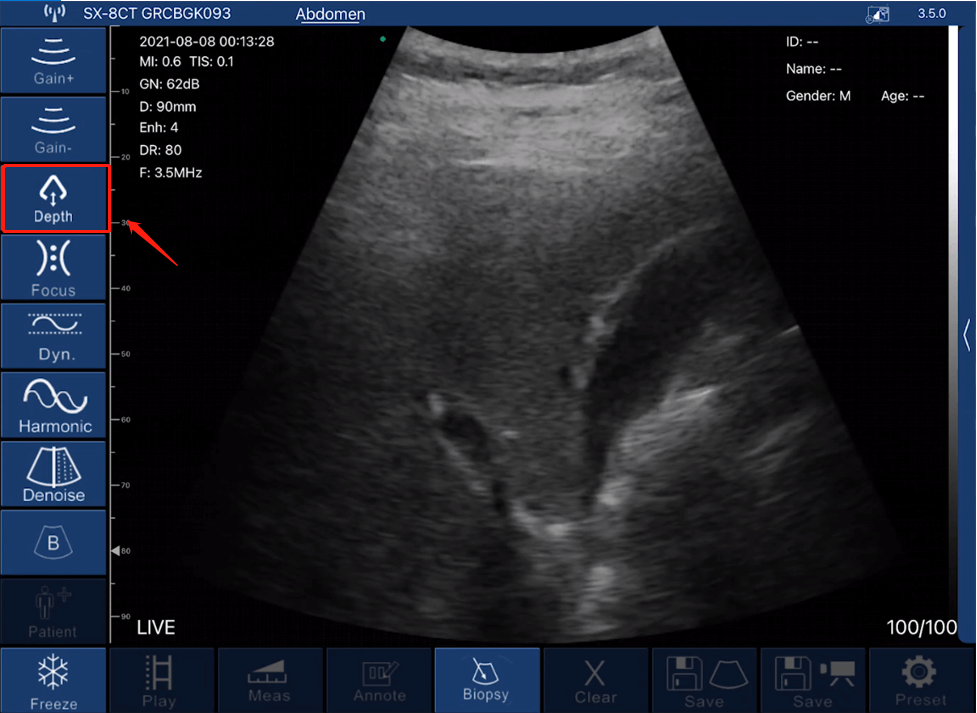
1. Depth (D): Scan depth control appears as 'Depth' in the parameters. Tap to increase or decrease.
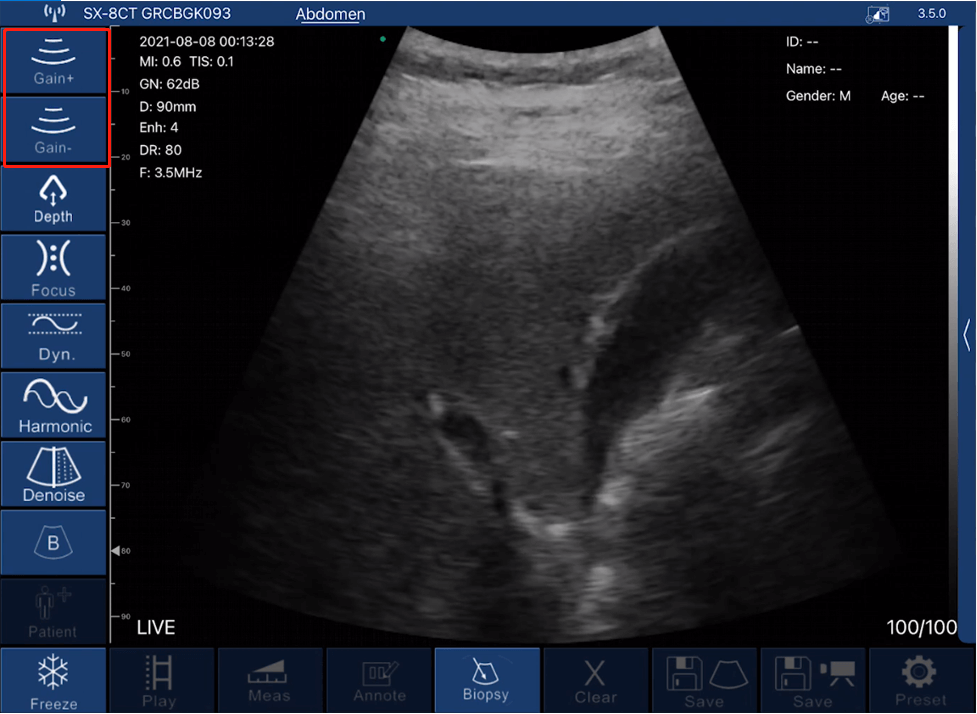
2. Gain (GN): Gain control appears as 'Gain+' icon and 'Gain-' icon in the parameters. Tap the 'Gain+' icon to increase or tap 'Gain-' icon to decrease the gain, from 30dB-105dB.
*Note: By increasing the gain, the view will become brighter, and more echo signals will be observed, while more imaging noise will appear.
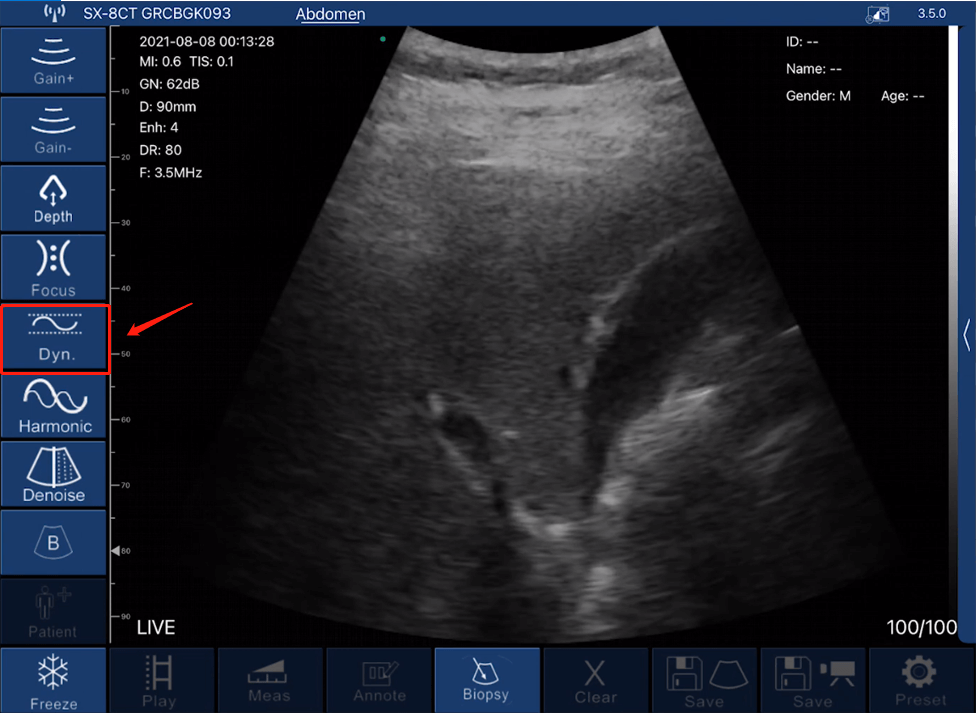
3. Dynamic Range (DR): DR control appears as 'Dyn' icon in the parameters. Tap to increase from 40-110.
*Note: Due to the increase of dynamic range, the image will show more layers and information, while bringing more noise.
4. Harmonic (Frequency): Frequency control appears as 'Harmonic' icon in the parameters. Tap to choose different frequencies.
*Note: Normally, frequency is automatically chosen according to specific presets.
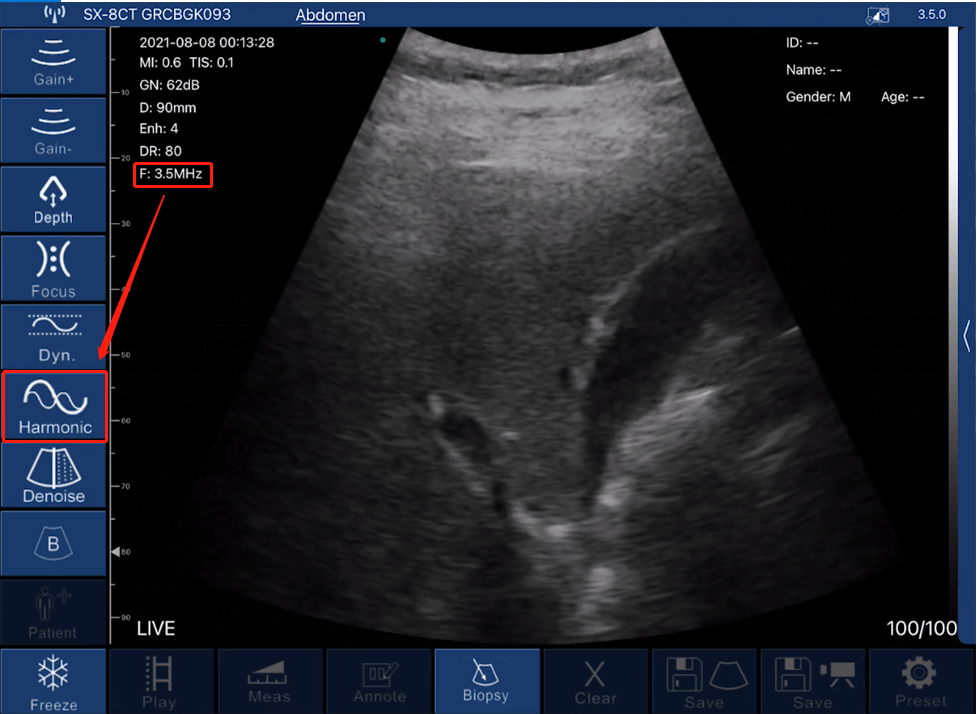
5. Denoise (Enhance): Denoise control appears as 'Denoise' icon in the parameters. Tap to choose from 0-4. 0 stands for no noise reduction. Normally, we recommend set up to 2 or 3.
*Note: Denoise means to decrease imaging noises. It will improve clarity, while the frame rate will be reduced.
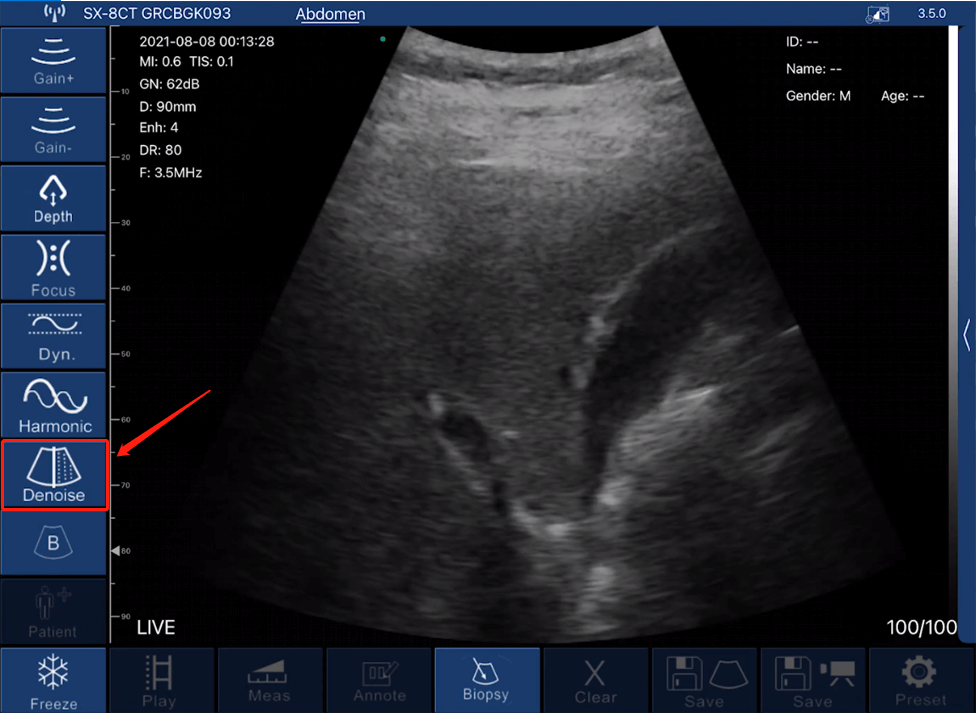
6. Focus: The focus control appears as 'Focus' icon in the parameters. Tap to choose from 0-3. The contrast and resolution of the image at the focus point will increase, thus obtaining a clearer view.
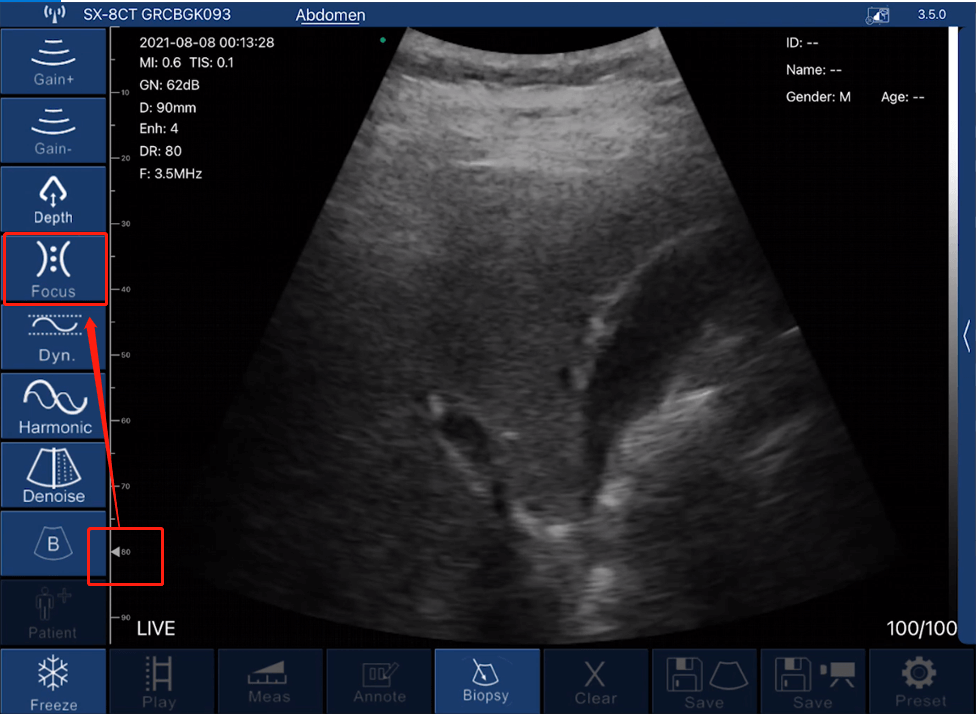
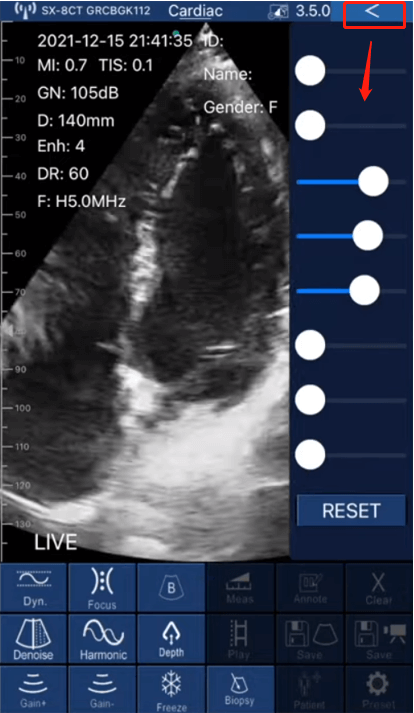
7. Time Gain Compensation (TGC): TGC control is available on the right side of the interface (tablet), if you are using a phone, the icon is on the top right. Tap the arrow icon to expand bars and slide to change.
*Note: TGC is to normalize the signal amplitude with time; compensating for depth.
8. Modes: Modes control appears as 'B' icon in the parameters. Tap the 'B' icon to expand for different doppler options, including B, B/M, Color Doppler, Pulsed Wave Doppler and Power Doppler. Tap to choose the mode you want.
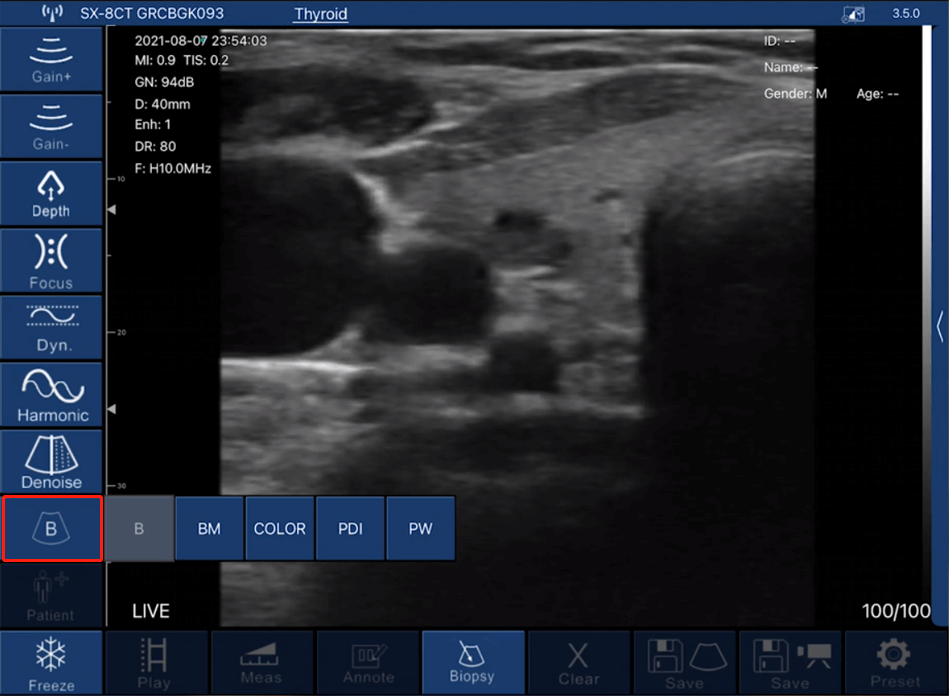
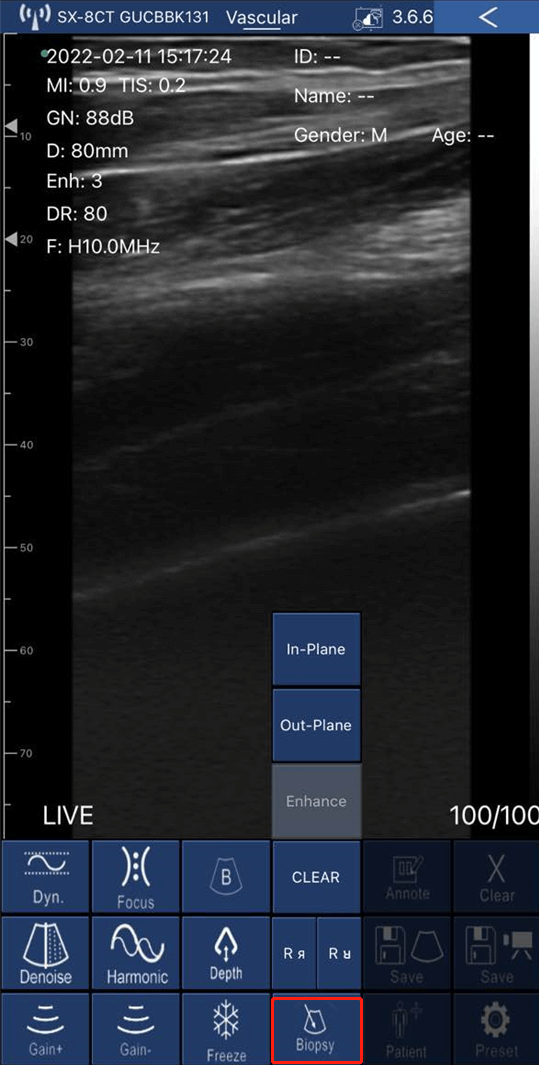
9. Biopsy (needle guidance): Biopsy function means to draw the puncture line for needle guidance. Tap 'Biopsy' icon to expand options such as in-plane and out-of-plane injections.
Download & install the App
For iOS devices, go to the Apple App Store . For Android devices, go to the Google Play Store. Search for the "WirelessUSG" App or " WirelessUSG Flash" App, and tap the install button. The app will begin installing on to your smart device. Tap to open and start scanning.


First Time Connection
1. Charge the scanner to ensure battery is full.
2. Press the center button to power on your probe, a blue light will appear on the button and the battery indicator will light up in blue.
3. Enable your phone's (or tablet's) WiFi.
4. Among your WLAN list, select the Wifi ID with the same last several characters/numbers as the SN on the back of the probe.
5. Input the connection password (on the back of the probe, the SN with the lower case is the password, for example, if the SN is WXPCAKK020, the password is wxpcakk020).
6. Once you successfully connect the probe's wifi to your device, you can launch and open the App.

App Settings (Adjustments)
For tablets, parameter adjustment is available on the left side of the App interface. For smartphones, parameter adjustment is available at the bottom of the App interface.
1. Depth (D): Scan depth control appears as 'Depth' in the parameters. Tap to increase or decrease.

2. Gain (GN): Gain control appears as 'Gain+' icon and 'Gain-' icon in the parameters. Tap the 'Gain+' icon to increase or tap 'Gain-' icon to decrease the gain, from 30dB-105dB.
*Note: By increasing the gain, the view will become brighter, and more echo signals will be observed, while more imaging noise will appear.

3. Dynamic Range (DR): DR control appears as 'Dyn' icon in the parameters. Tap to increase from 40-110.
*Note: Due to the increase of dynamic range, the image will show more layers and information, while bringing more noise.

4. Harmonic (Frequency): Frequency control appears as 'Harmonic' icon in the parameters. Tap to choose different frequencies.
*Note: Normally, frequency is automatically chosen according to specific presets.

5. Denoise (Enhance): Denoise control appears as 'Denoise' icon in the parameters. Tap to choose from 0-4. 0 stands for no noise reduction. Normally, we recommend set up to 2 or 3.
*Note: Denoise means to decrease imaging noises. It will improve clarity, while the frame rate will be reduced.

6. Focus: The focus control appears as 'Focus' icon in the parameters. Tap to choose from 0-3. The contrast and resolution of the image at the focus point will increase, thus obtaining a clearer view.

7. Time Gain Compensation (TGC): TGC control is available on the right side of the interface (tablet), if you are using a phone, the icon is on the top right. Tap the arrow icon to expand bars and slide to change.
*Note: TGC is to normalize the signal amplitude with time; compensating for depth.

8. Modes: Modes control appears as 'B' icon in the parameters. Tap the 'B' icon to expand for different doppler options, including B, B/M, Color Doppler, Pulsed Wave Doppler and Power Doppler. Tap to choose the mode you want.

9. Biopsy (needle guidance): Biopsy function means to draw the puncture line for needle guidance. Tap 'Biopsy' icon to expand options such as in-plane and out-of-plane injections.

For dual-head ultrasound(CProbe-CL) & linear-head ultrasound (UProbe-L).
Quick Start Guide
1. Charge the scanner to ensure battery is full.
2. Press the center button to power on your probe, a blue light will appear on the button and the battery indicator will light up in blue.
3. Enable your phone's (or tablet's) WiFi.
4. Among your WLAN list, select the Wifi ID with the same last several characters/numbers as the SN on the back of the probe.
5. Input the connection password (on the back of the probe, the SN with the lower case is the password, for example, if the SN is WXPCAKK020, the password is wxpcakk020).
6. Once you successfully connect the probe's wifi to your device, you can launch and open the App.

Download & install the App
For iOS devices, go to the Apple App Store . For Android devices, go to the Google Play Store. Search for the WirelessUSG App, and tap the install button. The app will begin installing on to your smart device. Tap to open and start scanning.


App Settings (Adjustments)
For tablets, parameter adjustment is available on the left side of the App interface. For smartphones, parameter adjustment is available at the bottom of the App interface.
1. Depth (D): Scan depth control appears as 'Depth' in the parameters. Tap to increase or decrease.

2. Gain (GN): Gain control appears as 'Gain+' icon and 'Gain-' icon in the parameters. Tap the 'Gain+' icon to increase or tap 'Gain-' icon to decrease the gain, from 30dB-105dB.
*Note: By increasing the gain, the view will become brighter, and more echo signals will be observed, while more imaging noise will appear.

3. Dynamic Range (DR): DR control appears as 'Dyn' icon in the parameters. Tap to increase from 40-110.
*Note: Due to the increase of dynamic range, the image will show more layers and information, while bringing more noise.

4. Harmonic (Frequency): Frequency control appears as 'Harmonic' icon in the parameters. Tap to choose different frequencies.
*Note: Normally, frequency is automatically chosen according to specific presets.

5. Denoise (Enhance): Denoise control appears as 'Denoise' icon in the parameters. Tap to choose from 0-4. 0 stands for no noise reduction. Normally, we recommend set up to 2 or 3.
*Note: Denoise means to decrease imaging noises. It will improve clarity, while the frame rate will be reduced.

6. Focus: The focus control appears as 'Focus' icon in the parameters. Tap to choose from 0-3. The contrast and resolution of the image at the focus point will increase, thus obtaining a clearer view.

7. Time Gain Compensation (TGC): TGC control is available on the right side of the interface (tablet), if you are using a phone, the icon is on the top right. Tap the arrow icon to expand bars and slide to change.
*Note: TGC is to normalize the signal amplitude with time; compensating for depth.

8. Modes: Modes control appears as 'B' icon in the parameters. Tap the 'B' icon to expand for different doppler options, including B, B/M, Color Doppler, Pulsed Wave Doppler and Power Doppler. Tap to choose the mode you want.

9. Biopsy (needle guidance): Biopsy function means to draw the puncture line for needle guidance. Tap 'Biopsy' icon to expand options such as in-plane and out-of-plane injections.

For pocket size ultrasound (D2CL).
Quick Start Guide
Wireless mode
1. Charge the scanner to ensure battery is full.
2. Press the center button to power on your probe, a green light will appear on the button and the battery indicator will light up in blue.
3. On your smart device, ensure you are connected to your secured Wi-Fi network and download the ultrasound App from the App Store (iOS) or Google Play (Android).
4. Enable your phone's WiFi. Among your WLAN list, find the probe’s wifi name starting with “UX-8C”. Click connect.
5. Input your password. Looking for a serial number on the back of the unit, a string of 10-digit letters and digits starting with “uxc”. Then enter them in the lowercase form. (For example, if the SN is UXCCAHA079, the password is uxccaha079).
6. Once you successfully connect the probe to your device, you can launch and open the App.
Wire mode (only available on Android device)
1. Charge the scanner to ensure battery is full.
2. Press the center button to power on your probe, a green light will appear on the button and the battery indicator will light up in blue.
3. On your smart device, ensure you are connected to your secured Wi-Fi network and download the ultrasound App from the App Store (iOS) or Google Play (Android).
4. Plug one side of the Type-C USB cable into the probe. Then, plug the other side of the cable into your Android device.
5. Once you successfully connect the probe to your device, you can launch and open the App.
Download & install the App
For iOS devices, go to the Apple App Store . For Android devices, go to the Google Play Store. Search for the microVue App, and tap the install button. The app will begin installing on to your smart device. Tap to open and start scanning.


App Settings (Adjustments)
For tablets, parameter adjustment is available on the right side of the App interface. For smartphones, parameter adjustment is available at the bottom of the App interface.
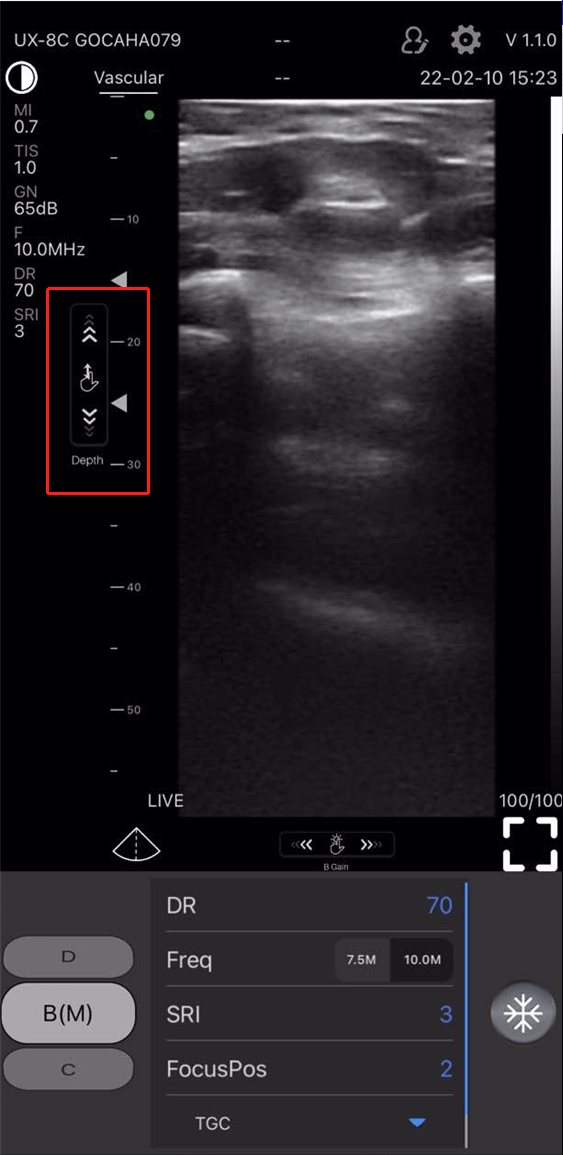
1. Depth (D): Scan depth can be adjusted by scroll up and down on the left side of the screen.
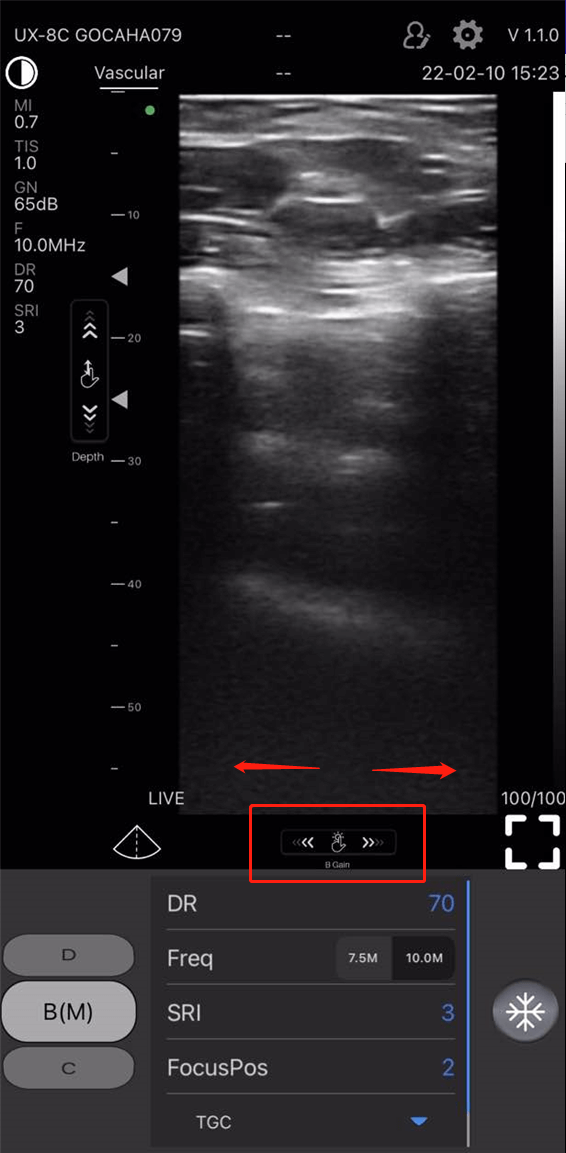
2. Gain (GN): Gain control is available at the bottom of the screen, slide your finger right or left to increase or decrease the gain.
*Note: By increasing the gain, the brightness of the image will increase, and more echo signals can be observed, while more noise will take place.
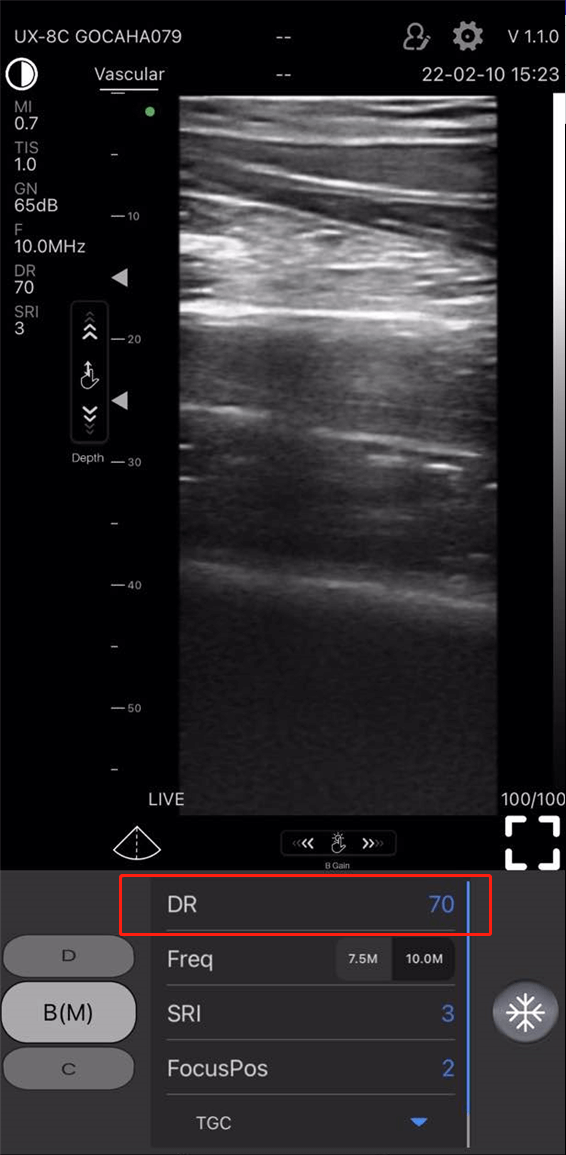
3. Dynamic Range (DR): Under B(M) mode, DR control appears as 'DR' in the parameters. Tap to increase from 40-110.
*Note: Due to the increase of dynamic range, the image will show more layers and information, while bringing more noise.
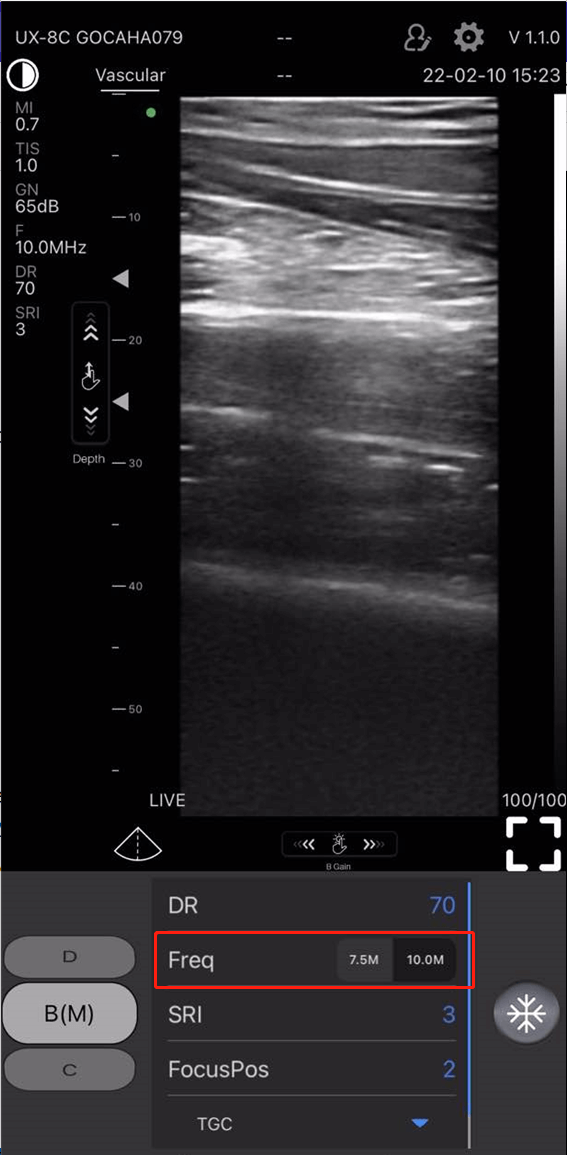
4. Frequency (Freq): Frequency control appears as 'Freq' in the parameters. Tap to choose different frequencies.
Note: Normally, frequency is chosen automatically according to a specific preset.
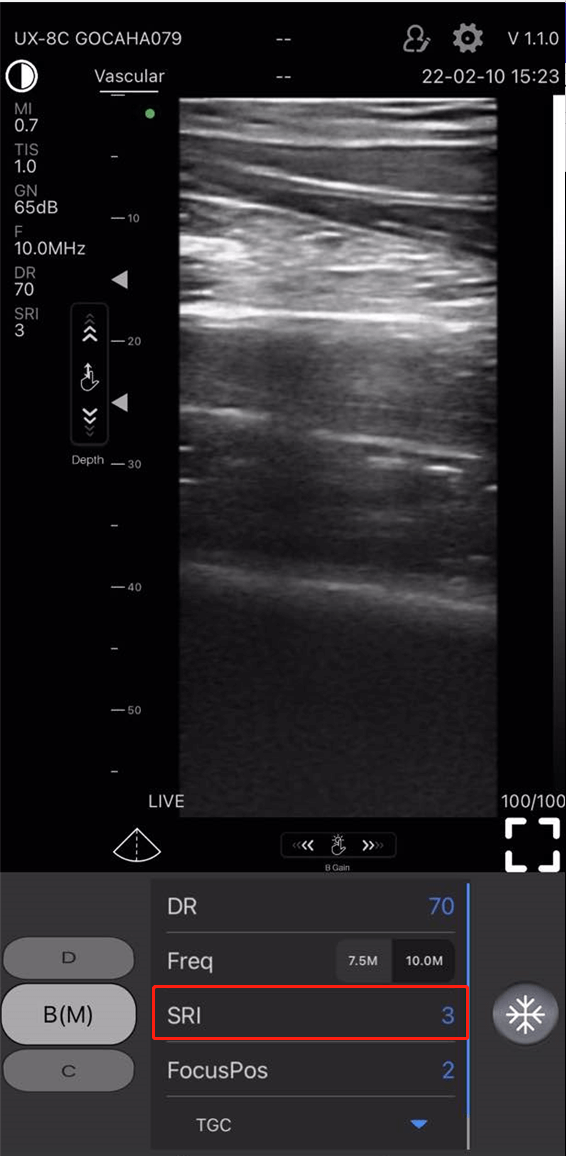
5. Speckle Reduction Imaging (SRI): SRI control appears as 'SRI' in the parameters. Tap to choose from 0-4. 0 stands for no noise reduction. Normally, we recommend set up to 2 or 3.
*Note: SRI means to decrease imaging noises. It will improve clarity, while the frame rate will be reduced.
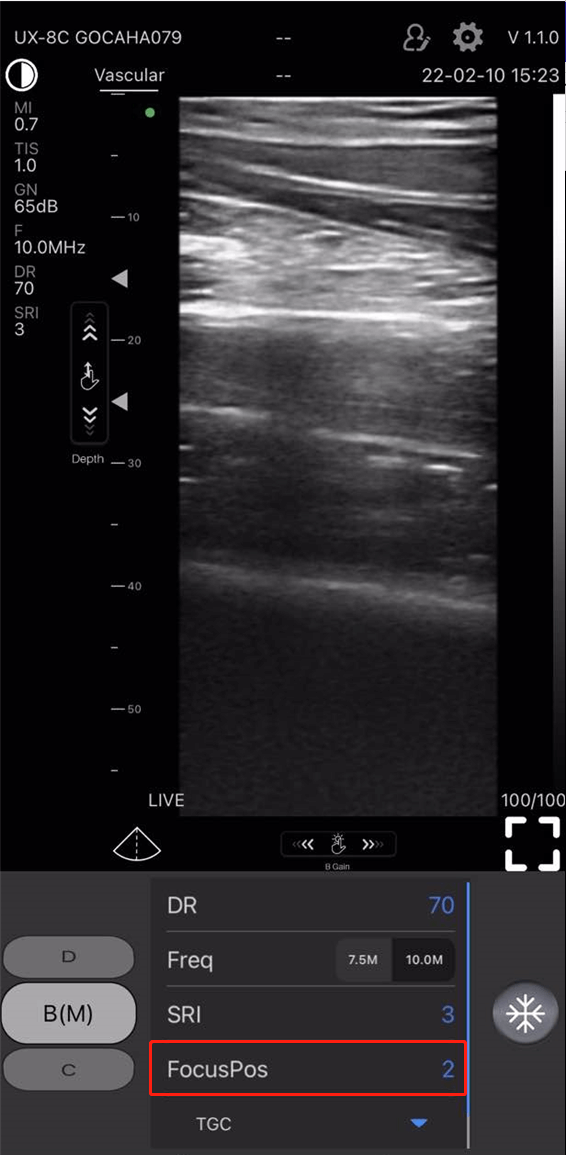
6. Focus Position (FocusPos): Focus position control appears as 'FocusPos' in the parameters. Tap to choose from 0-3. The contrast and resolution of the image at the focus point will increase, thus obtaining a clearer view.
7. Time Gain Compensation (TGC): TGC control (appears as 'TGC' in the parameters) is visible underneath the focus position control. Tap the triangular icon to expand the bars and slide to change.
*Note: TGC is to normalize the signal amplitude with time; compensating for depth.
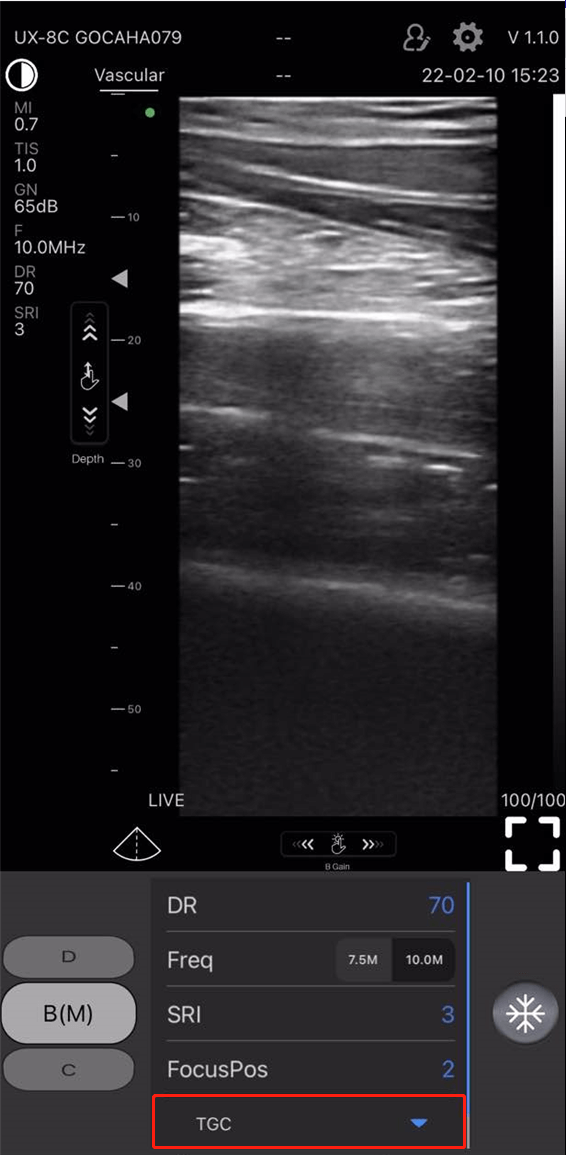
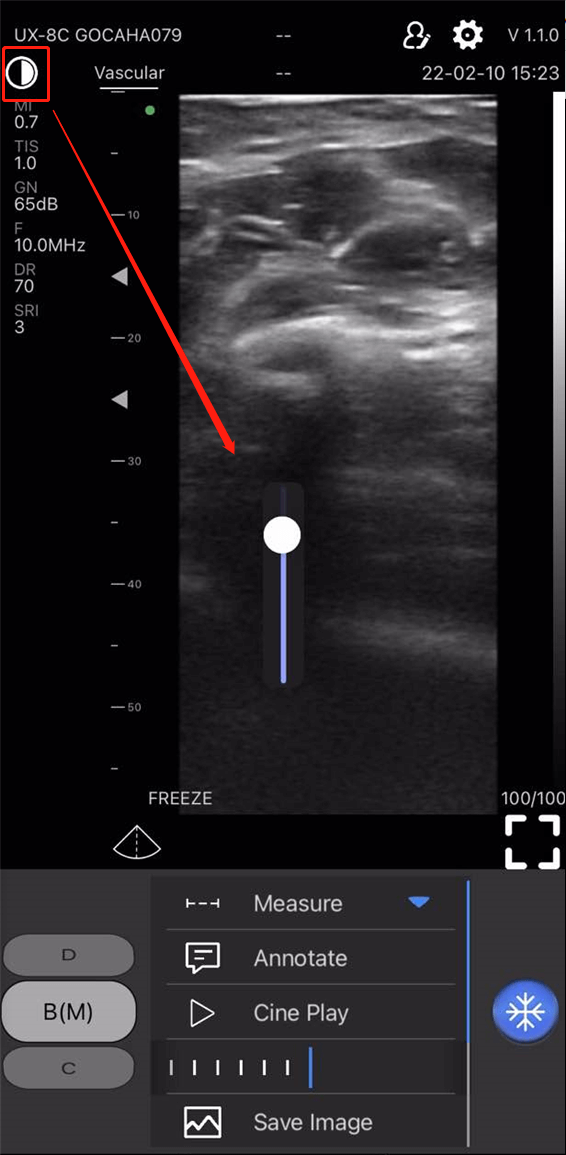
8. Brightness: Brightness control is available on the top of the App interface. Tap the circle icon, when the brightness bar is visible, slide up or down to increase or decrease the brightness of the screen.
